[1/2]How to expose your local Kubernetes Services through Cloudflare Tunnel without Ingress
As a Homelabber, it could be challenging on exposing the apps hosted on your local Kubernetes cluster. For example, you may need to deal…
First published on Medium
As a Homelabber, it could be challenging on exposing the apps hosted on your local Kubernetes cluster. For example, you may need to deal with setting up Ingress Controller and some SSL certificates. They are not super complicated things and actually you should learn them on advancing your skills of Kubernetes. If you are not ready to touch them, maybe it is a good option to use Cloudflare Tunnel on exposing the Kubernetes Services to the Internet.
Cloudflare Tunnel provides you with a secure way to connect your resources to Cloudflare without a publicly routable IP address. Again as a Homelabber without static public IP, it is a really good way to connect your server to Internet.
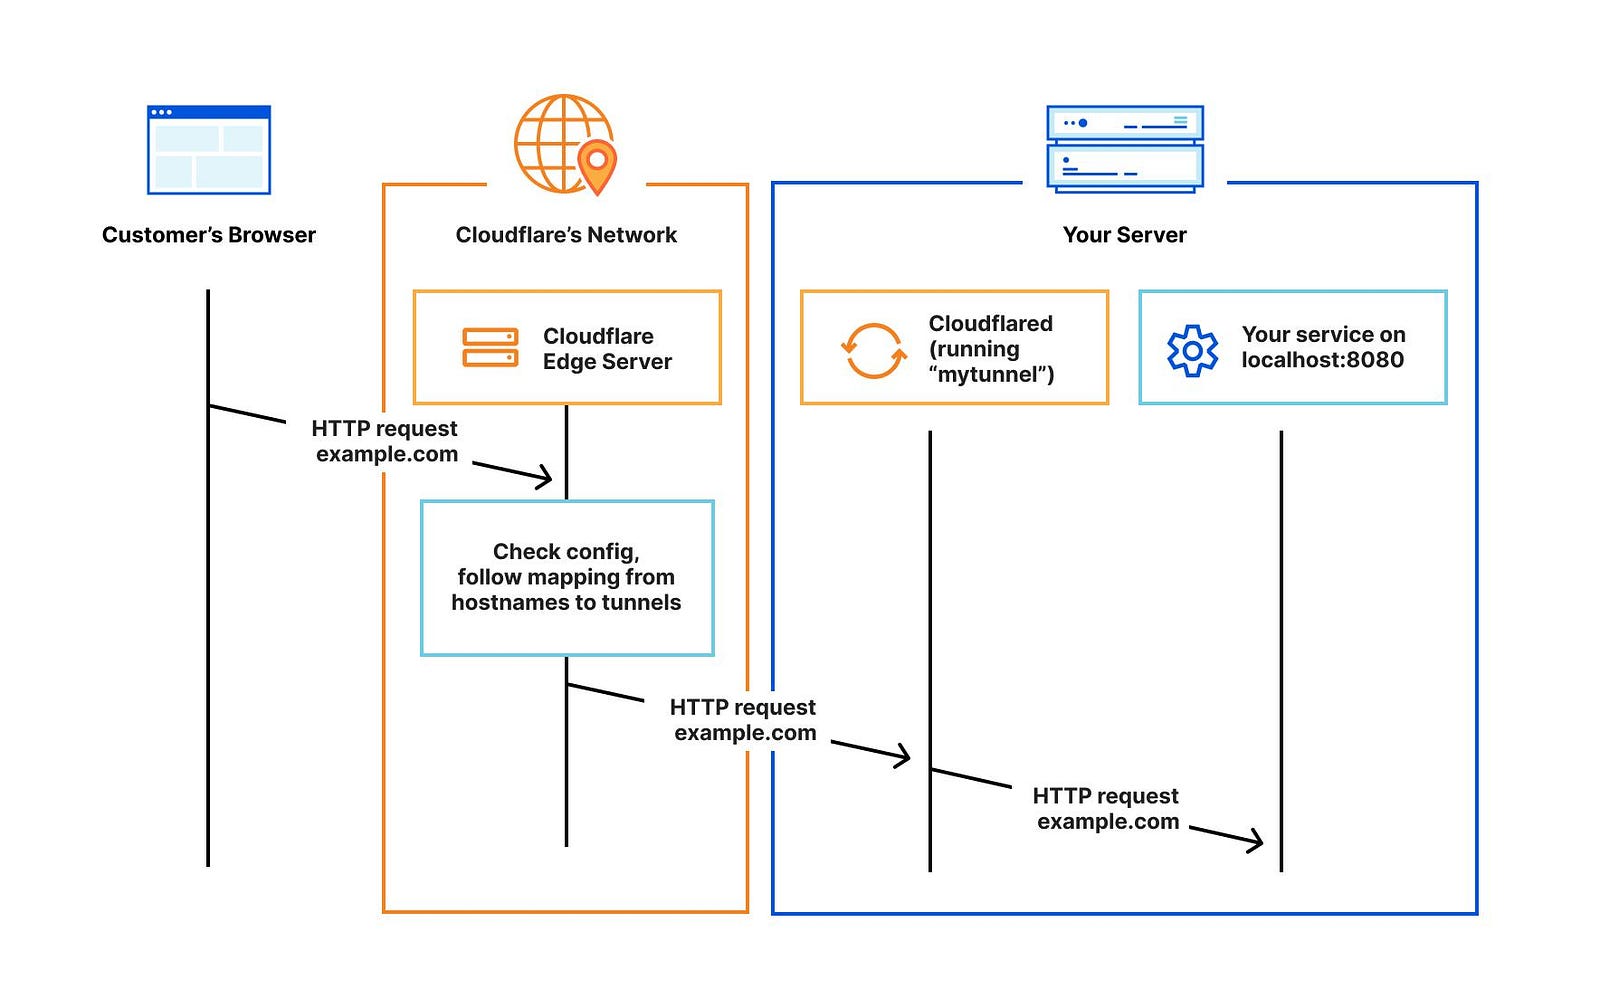
Cloudflare Tunnel mechanism
To start with, you need the following items prepared.
- A Kubernetes cluster (Single node K3s cluster as example in this article)
- A Cloudflare account with a domain configured to use their host zone
kubectlcommand-line tool- Right to install new package to your node
Let’s get started!
Install cloudflared
cloudflared is a lightweight Cloudflare Tunnel daemon. You need to install it in your cluster node. They support multiple platforms, including Linux, macOS, Windows and Docker. You can the appropriate version from here. In this article, we will use Debian 11 Bullseye.
# Add cloudflare gpg key
sudo mkdir -p --mode=0755 /usr/share/keyrings
curl -fsSL https://pkg.cloudflare.com/cloudflare-main.gpg | sudo tee /usr/share/keyrings/cloudflare-main.gpg >/dev/null

# Add this repo to your apt repositories
echo 'deb [signed-by=/usr/share/keyrings/cloudflare-main.gpg] https://pkg.cloudflare.com/cloudflared bullseye main' | sudo tee /etc/apt/sources.list.d/cloudflared.list

# install cloudflared
sudo apt-get update && sudo apt-get install cloudflared
You can check if the installation has succeed.
cloudflared version
Now, you can login to Cloudflare
cloudflared tunnel login
It will open your browser and ask you for authorization.
Create a new tunnel
The next step is to create a tunnel as the middleware between Cloudflare network and your node.
cloudflared tunnel create k3s-tunnel
An output contains the location of tunnels credential will be printed out.

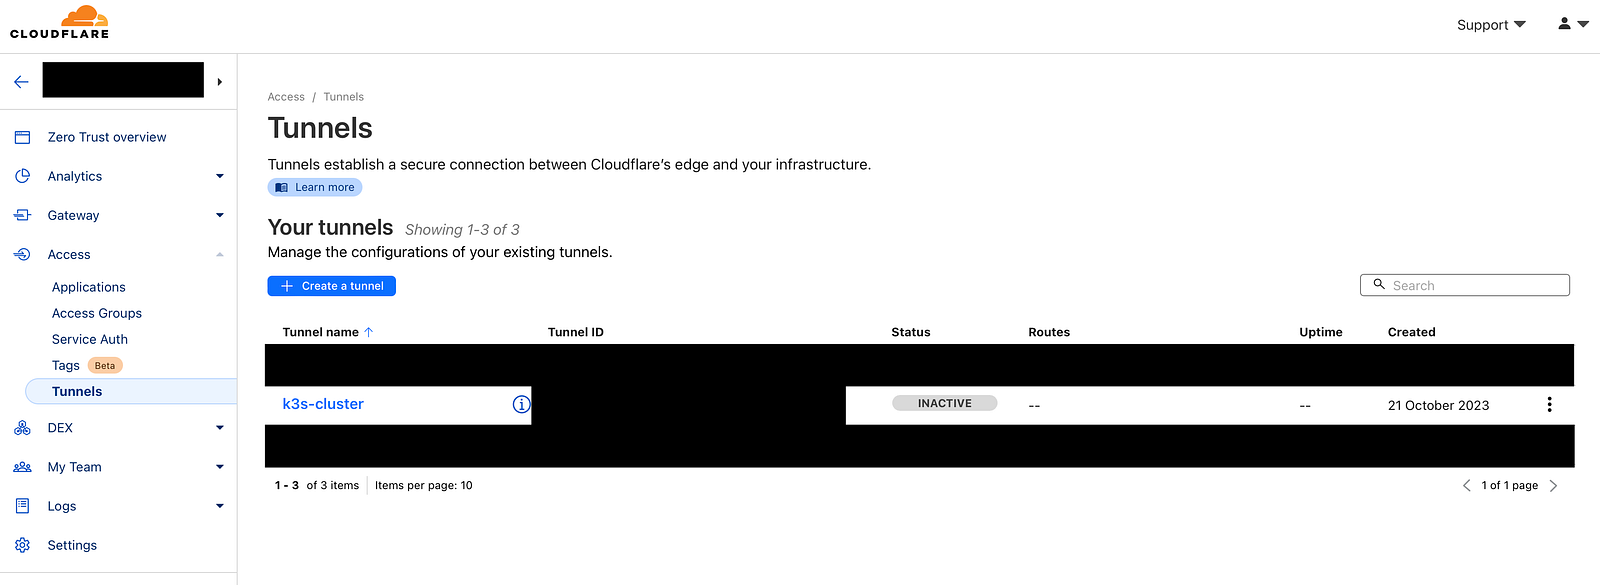
When you check Cloudflare web portal, choose Zero Trust from left menu, then choose Access > Tunnels. You will see a newly created tunnel. Don’t worry with the INACTIVE status.
Upload the tunnel credentials to K3s cluster
In previous step, we have created a new tunnel and its credentials file have stored in your node. In this step, we need to create a Kubernetes Secret from this credentials file.
kubectl create secret generic tunnel-credentials \
--from-file=credentials.json=<path of credential file>

Example:
kubectl create secret generic tunnel-credentials \
--from-file=credentials.json=/Users/tonychan/.cloudflared/ef824aef-7557-4b41-a398-4684585177ad.json
Replace <path of credential file> to the path you got from the output of tunnel creation.
Notes: Specify the namespace if you plan to separate all the Cloudflare-related resources into a namespace.
Create a DNS record associating your tunnel
Before we deploy the cloudflared into the cluster, we need to create a DNS record that pointing the tunnel to your desired hostname.
You can create it on Cloudflare portal with a CNAME record that targeting <tunnel ID>.cfargotunnel.com .
Or you can simply run this command.
cloudflared tunnel route dns <tunnel name> <hostname>

Example:
cloudflared tunnel route dns k3s-cluster test.example.com
Deploy cloudflared
Finally, we need to deploy cloudflared manifests which includes a Deployment for the cloudflared and a ConfigMap for its configurations.
---
apiVersion: apps/v1
kind: Deployment
metadata:
  name: cloudflared
spec:
  revisionHistoryLimit: 0
  selector:
    matchLabels:
      app: cloudflared
  replicas: 2
  template:
    metadata:
      labels:
        app: cloudflared
    spec:
      containers:
      - name: cloudflared
        image: cloudflare/cloudflared:2023.8.2
        args:
        - tunnel
        - --config
        - /etc/cloudflared/config/config.yaml
        - run
        livenessProbe:
          httpGet:
            path: /ready
            port: 2000
          failureThreshold: 1
          initialDelaySeconds: 10
          periodSeconds: 10
        volumeMounts:
        - name: config
          mountPath: /etc/cloudflared/config
          readOnly: true
        - name: creds
          mountPath: /etc/cloudflared/creds
          readOnly: true
      volumes:
      - name: creds
        secret:
          secretName: tunnel-credentials
      - name: config
        configMap:
          name: cloudflared-configmap
          items:
          - key: config.yaml
            path: config.yaml

---
apiVersion: v1
kind: ConfigMap
metadata:
  name: cloudflared-configmap
data:
  config.yaml: |
    tunnel: k3s-cluster
    credentials-file: /etc/cloudflared/creds/credentials.json
    metrics: 0.0.0.0:2000
    no-autoupdate: true
    ingress:
    - hostname: test.example.com
      service: http://service-name.namespace-name.svc.cluster.local:80
    - service: http_status:404
Replace the ingress section in ConfigMap with your desired hostname and the service endpoint to your Kubernetes service.
As it is a list, you can actually add multiple hostname records to expose multiple services. Don’t forget to add their corresponding DNS records.
Now you should be able to connect your Kubernetes Service through Internet by using the hostname. As Cloudflare tunnel supports both HTTP and HTTPS, you can set a force-HTTPS on Cloudflare portal if you want a HTTPS only traffic.
This article tells you how to expose Kubernetes Services by cloudflared. Next article will tell you how to update the routing defined in ConfigMap and refresh the pods automatically by ArgoCD.